Step 1. Go to sjc.wela.online and click on "Enroll College". Fill out the form and click "Save".

Step 2. Once the student has accomplished filling out the form, Registrar will then log in to the school's Wela portal.
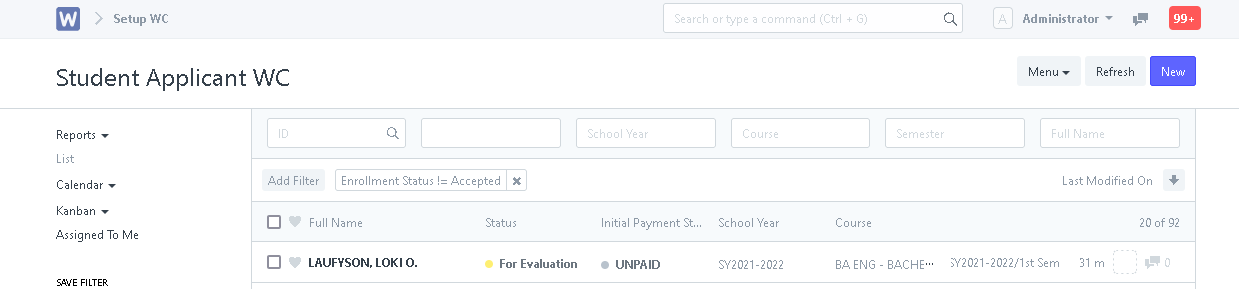
Step 3. After logging in, click the "Applicant WC" icon.

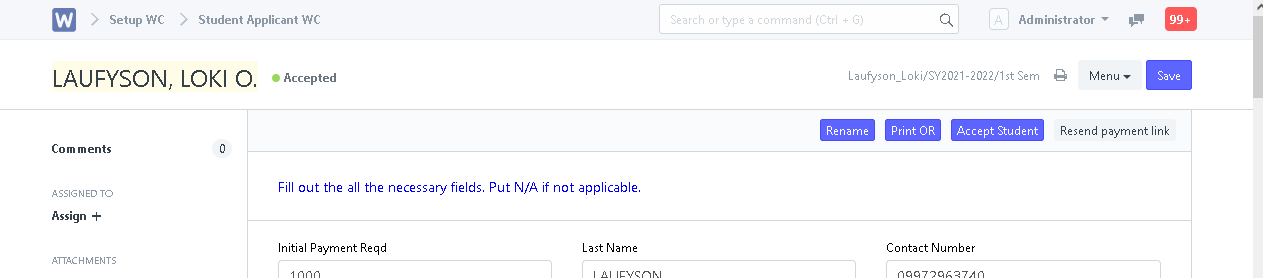
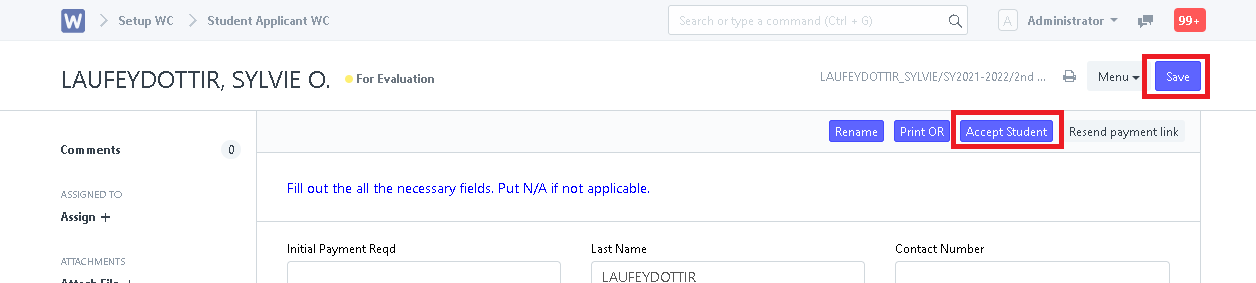
Step 4. Open an applicant entry. Evaluate the entry of the applicant by checking the uploaded requirements and information of the applicant.
- For New/Transferee Students - After evaluating the student applicant, click "Save" then click "Accept". System will them prompt User to search for the student's previous record. Leave it blank and click "Accept" since New Student.
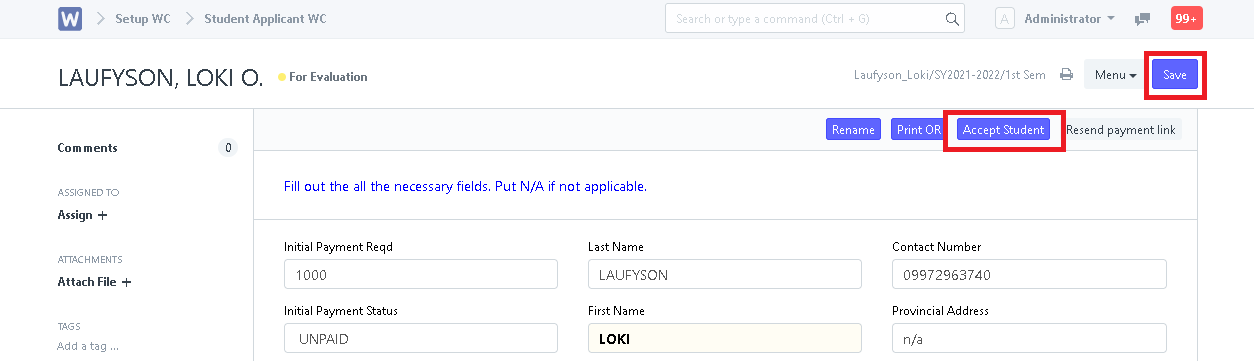
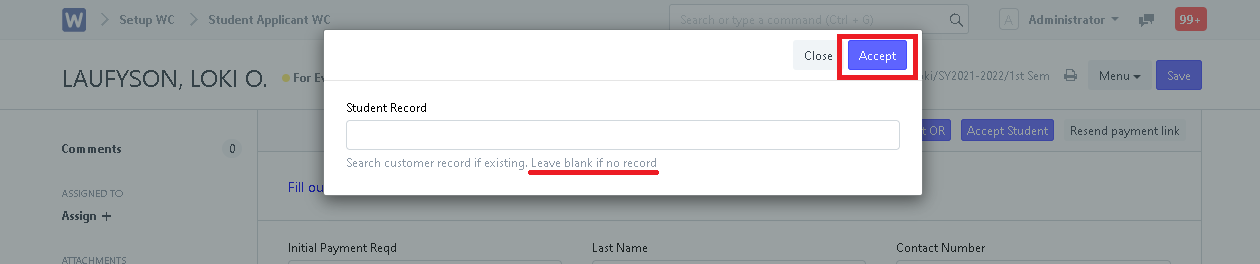
- For Continuing Students - After evaluating the student applicant, click "Save" then click "Accept". System will them prompt User to search for the student's previous record. Input the student's name (Last Name, First Name) to search for previous record then click "Accept".


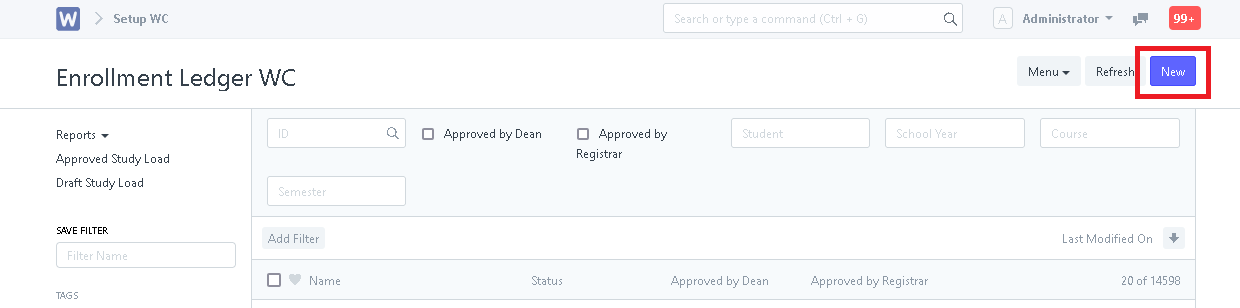
Step 5. Go to Enrollment Ledger WC by clicking the icon in the desk or by search.

Step 6. Click "New"
Step 7. Select the Enrolling Semester and School Year.

Step 8. Click the "Student Info" tan and enter student name in "Student". Will then auto-fill the info in Student Info.

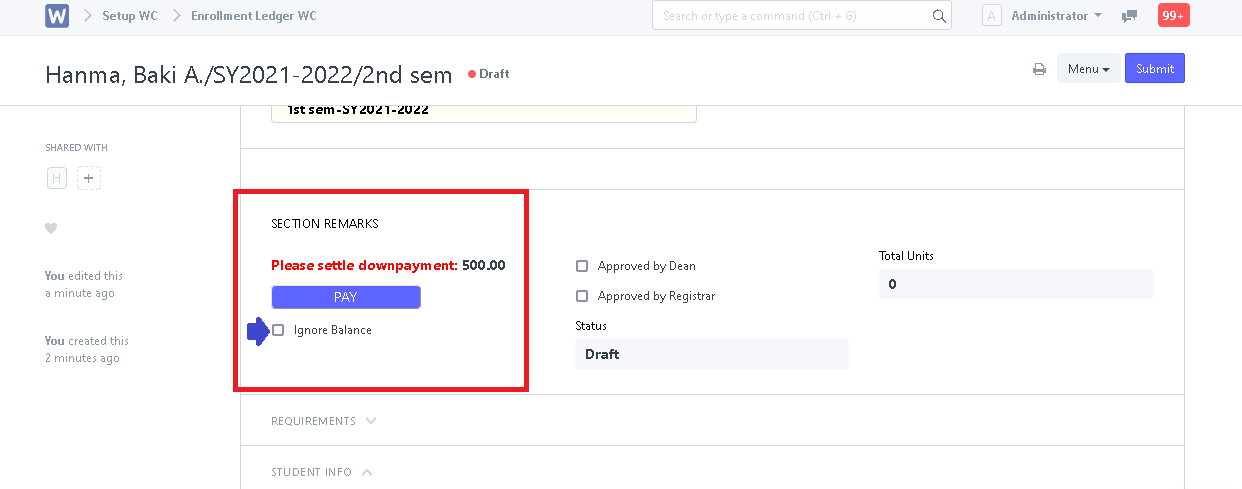
Step 9. Wait for student to pay balance/registration fee to be able to proceed with sectioning and adding of subjects. User can optionally click the "Ignore Balance" to proceed.
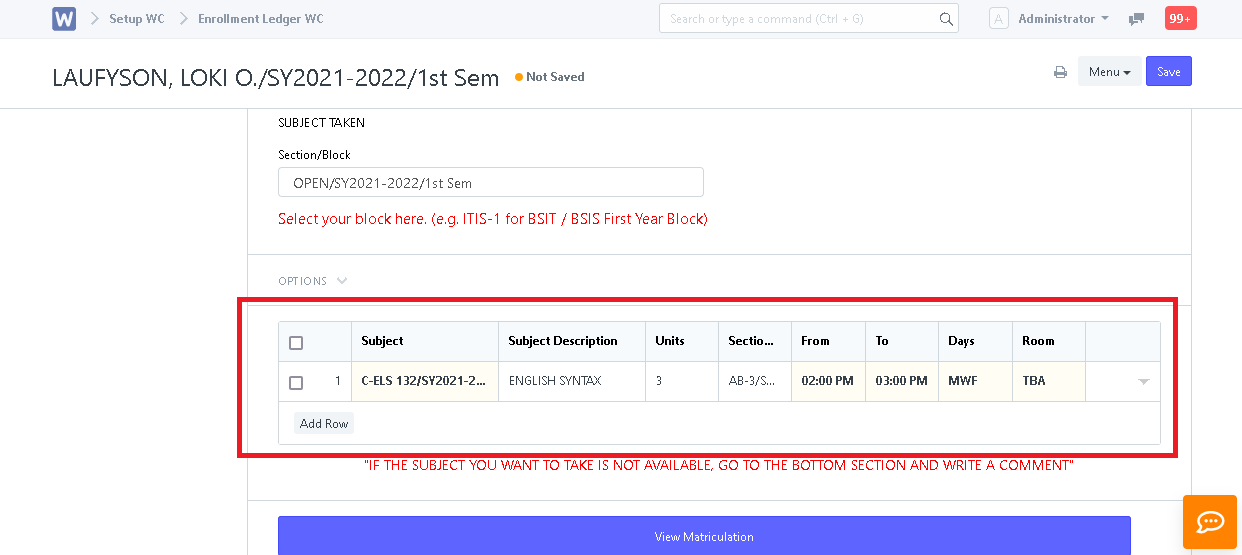
Step 10. Once payment is settled, User can now proceed to section and add the student's subjects.
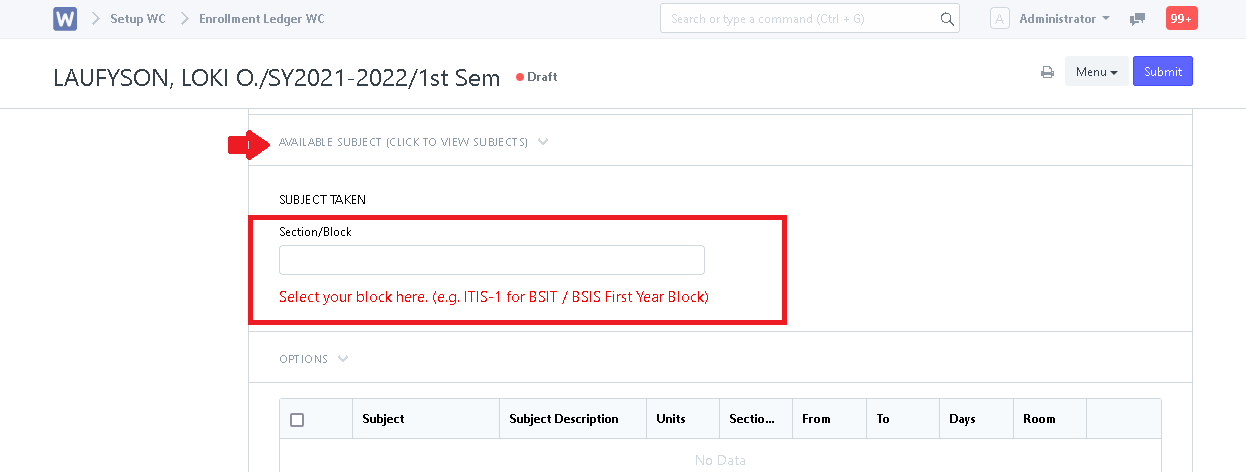
- Choose section available in "Section/Block" to section student. Subjects pre-loaded in the chosen section will be added automatically to the student (Except for subjects that are full or have no schedule)
- To manually add subjects, click the "Available Subjects" tab and choose a subject to add.
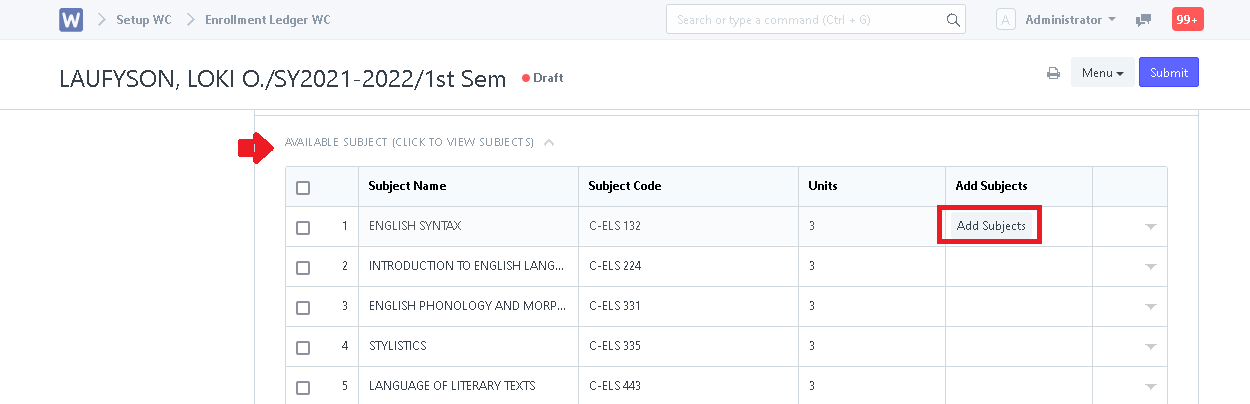
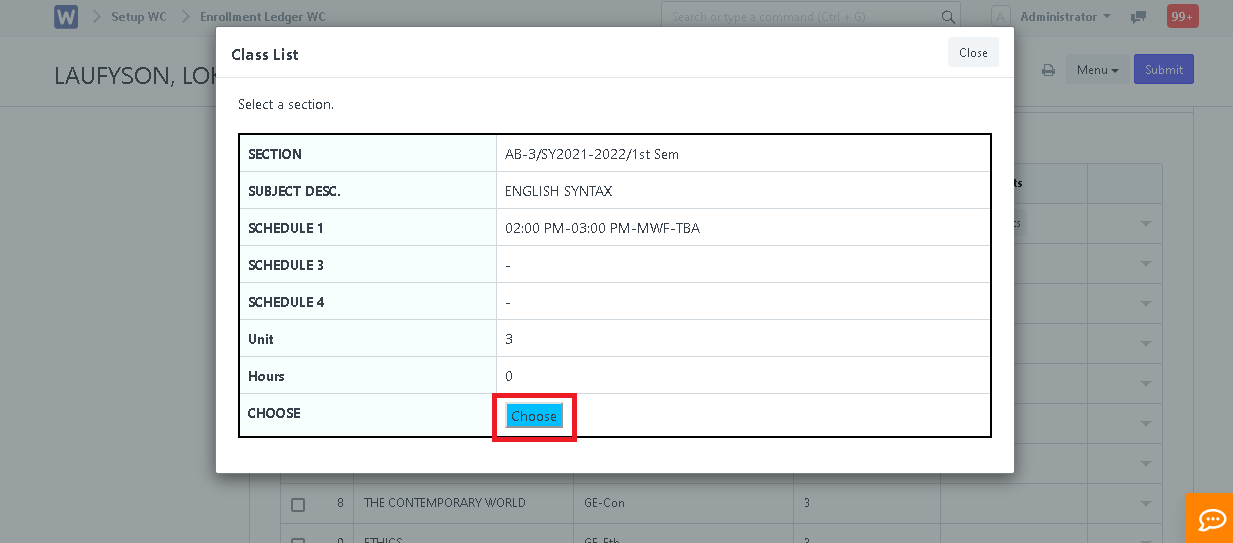
- Chosen subjects will now be added to the table below.
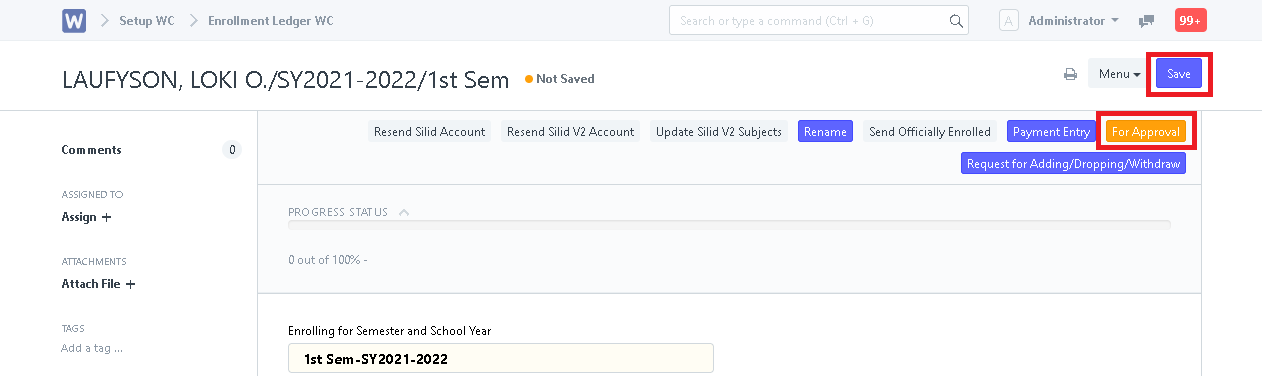
Step 11. Click "Save" after setting up the student's Enrollment Ledger then click "For Approval" to start the approval process.
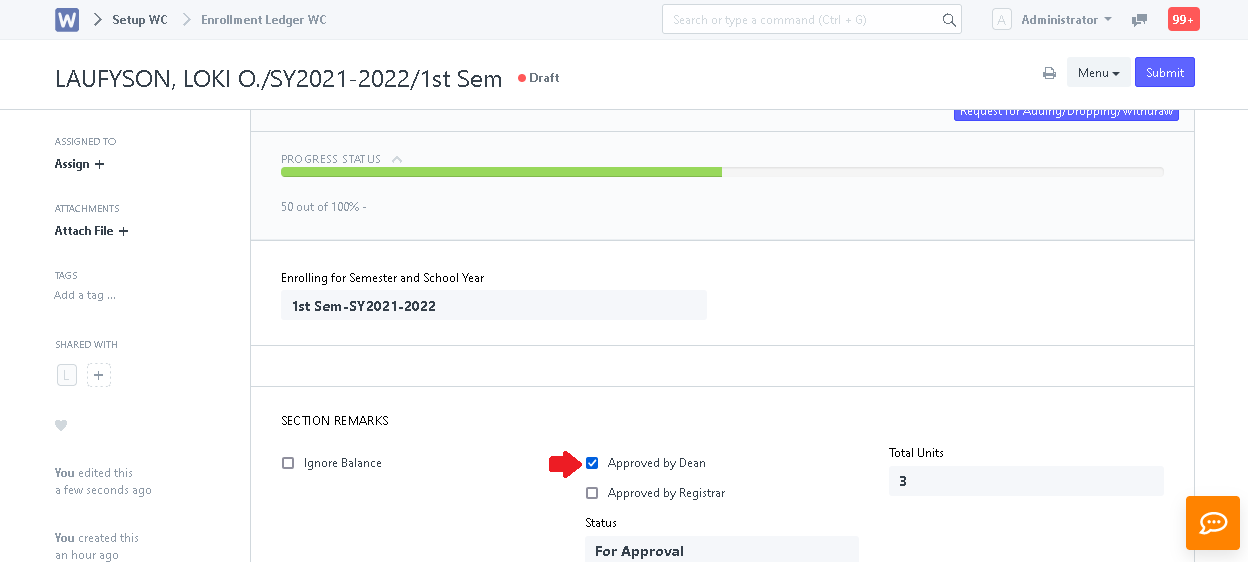
Step 12. The Dean must approve by checking the box "Approved by Dean" then click "Save".
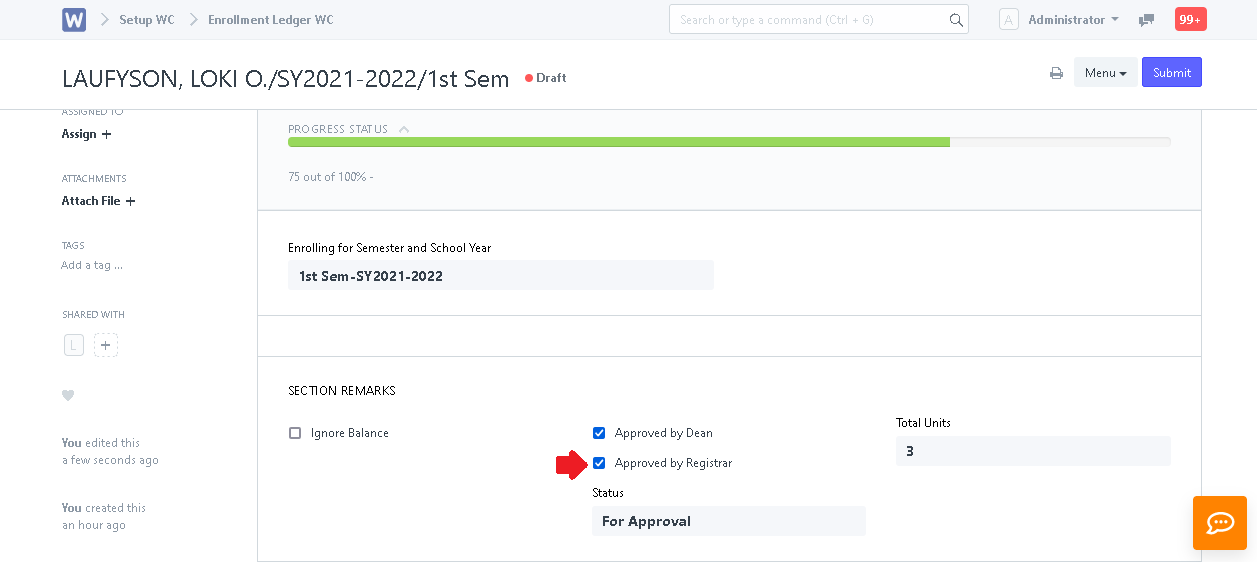
Step 13. After approval of the Dean, the Registrar must approve by checking "Approved by Registrar" then click "Save".
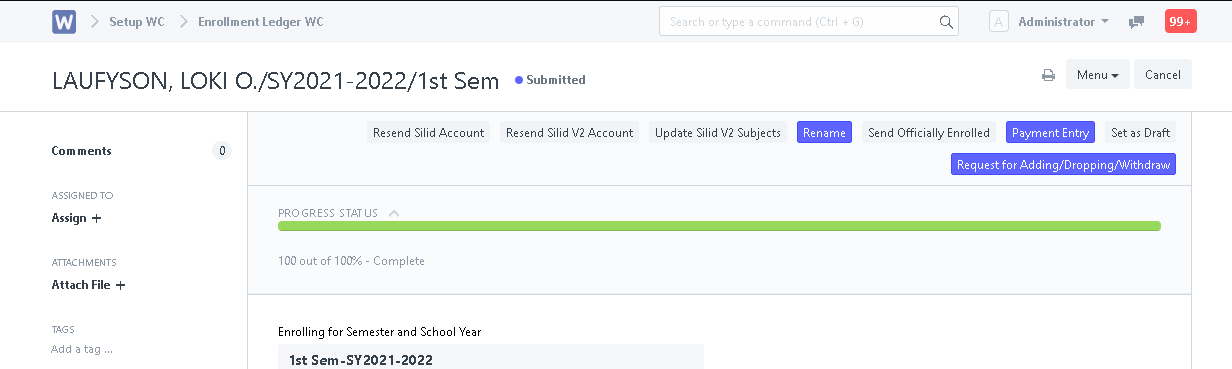
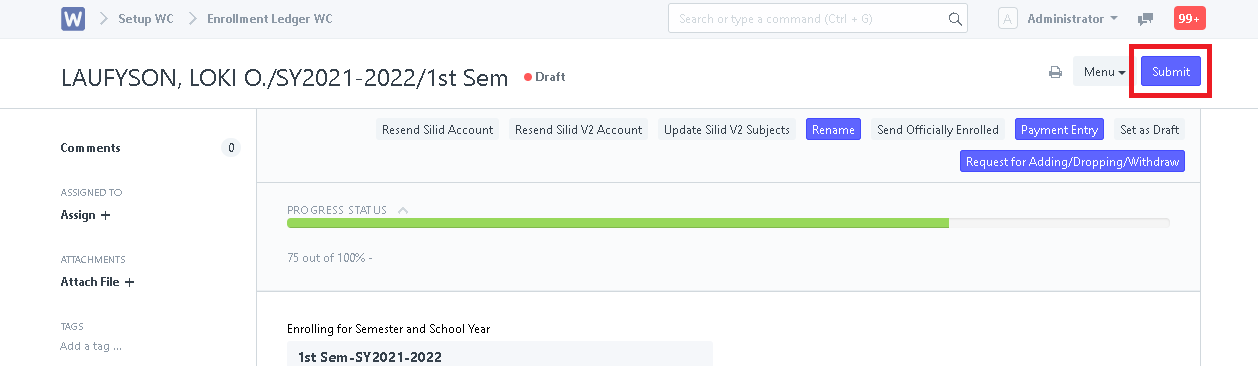
Step 14. After being approved by Dean and Registrar, User can now click "Submit" to officially enroll the student.
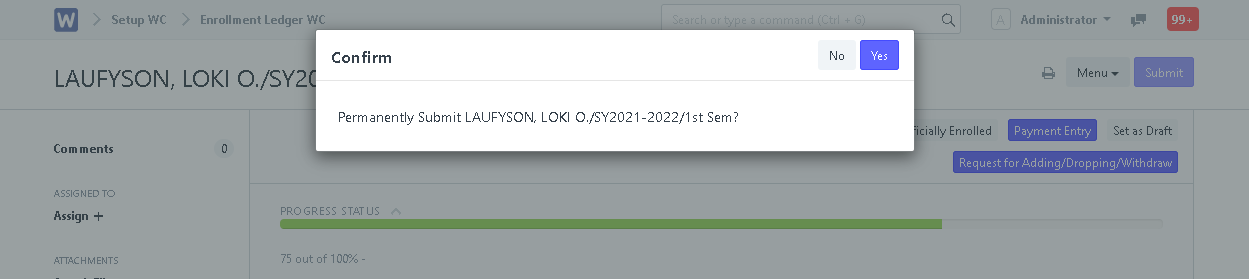
Step 15. Click "Yes" to confirm submission.
Student is now Officially Enrolled.